

The alternator is a crucial component in a vehicle's electrical system, responsible for generating the necessary electrical power to charge the battery and supply energy to various electrical components. Without a properly functioning alternator, a vehicle's battery would quickly drain, leaving you stranded and unable to start the engine or operate essential systems like headlights, radio, and other accessories.
As a car owner, understanding the signs of alternator problems and knowing how to diagnose and troubleshoot these issues can save you from costly repairs and unexpected breakdowns. In this comprehensive guide, I will walk you through the process of identifying and resolving common alternator issues, step by step.
Common signs of alternator issues
Before diving into the troubleshooting process, it's essential to recognize the telltale signs of an alternator problem. Some common indicators include:
- Dimming headlights or interior lights, especially when the engine is idling or under load
- Battery frequently draining or requiring frequent jump-starts
- Electrical accessories (radio, power windows, etc.) not functioning properly or intermittently
- Warning lights on the dashboard, such as the battery or alternator light
- Unusual noises coming from the alternator, such as whining or grinding sounds
If you notice any of these signs, it's crucial to address the issue promptly to prevent further damage and potential breakdowns.
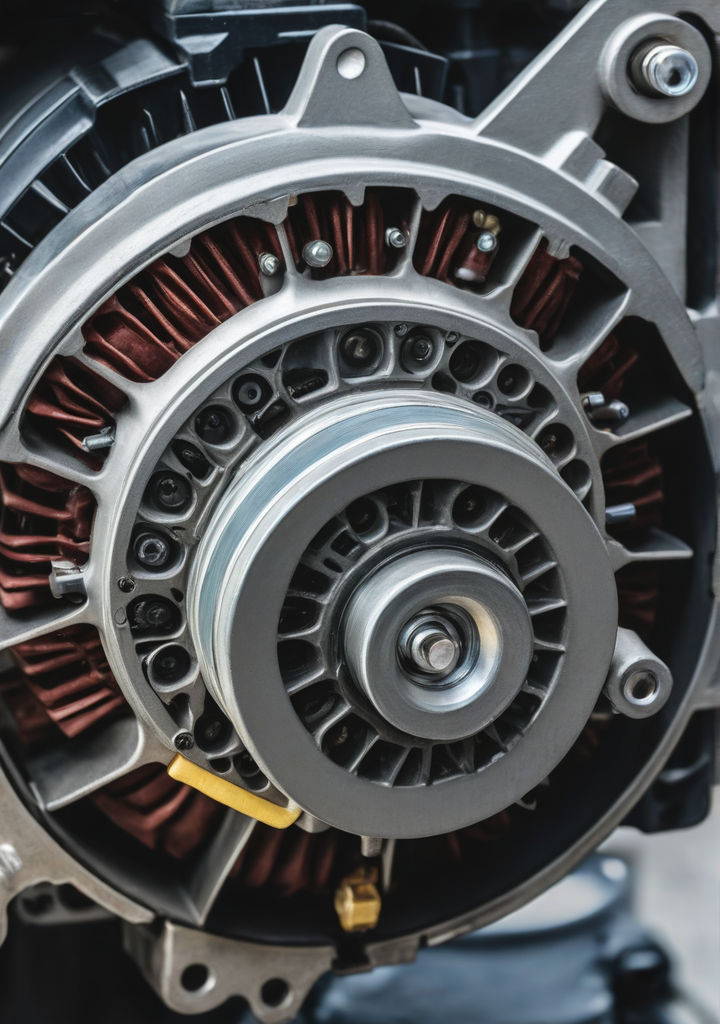
Understanding the different components of an alternator
To effectively troubleshoot alternator issues, it's helpful to understand the different components that make up this vital system. An alternator typically consists of the following parts:
- Rotor: This rotating component generates the alternating current (AC) through electromagnetic induction.
- Stator: This stationary component contains the windings that convert the AC from the rotor into direct current (DC) for charging the battery and powering electrical systems.
- Voltage regulator: This component regulates the output voltage of the alternator to ensure it matches the battery's charging requirements.
- Diode rectifier: This component converts the AC from the stator into DC for the battery and electrical systems.
- Brushes and slip rings: These components transfer current from the rotating rotor to the stationary components.
- Cooling fan: This component helps dissipate heat generated by the alternator during operation.
Understanding these components will help you better diagnose and isolate potential issues during the troubleshooting process.
Step 1: Checking the battery
Before diving into alternator troubleshooting, it's crucial to ensure that the battery itself is in good condition. A faulty battery can often mimic alternator issues, so it's essential to rule out this possibility first.
- Inspect the battery for any visible signs of damage, such as cracks, bulges, or leaks.
- Check the battery's age and replace it if it's nearing the end of its expected lifespan (typically 3-5 years).
- Use a voltmeter or multimeter to test the battery's voltage. A fully charged 12-volt battery should read between 12.6 and 12.8 volts.
- If the battery voltage is low, try charging it with a battery charger and retest. If the voltage still doesn't reach the desired level, the battery may need to be replaced.
If the battery checks out, you can proceed to the next step of testing the alternator itself.
Step 2: Testing the alternator with a multimeter
One of the most reliable ways to diagnose alternator issues is by using a multimeter to test the alternator's output voltage and current. Here's how to do it:
- Park your vehicle on a level surface and engage the parking brake.
- Locate the alternator's positive and negative battery terminals. These are usually marked with "+" and "-" symbols or colored red (positive) and black (negative).
- With the engine running, connect the multimeter's positive lead to the positive battery terminal and the negative lead to the negative battery terminal.
- The multimeter should display a voltage reading between 13.5 and 14.5 volts, indicating that the alternator is charging the battery correctly.
- If the voltage reading is below 13.5 volts, the alternator may not be charging the battery sufficiently, indicating a potential issue.
- To further test the alternator, turn on electrical loads like headlights, air conditioning, and other accessories. The voltage reading should remain within the normal range, or it may indicate an alternator problem.
If the multimeter test reveals abnormal voltage readings, it's time to investigate the alternator's components more closely.
Step 3: Inspecting the alternator belt
The alternator belt, also known as the serpentine belt or drive belt, is responsible for transferring the engine's rotational power to the alternator. A worn, loose, or damaged belt can cause the alternator to underperform or fail entirely.
- Locate the alternator belt and inspect it for any visible signs of wear, cracks, or fraying.
- Check the belt's tension by applying moderate pressure with your thumb. The belt should deflect slightly but not more than half an inch.
- If the belt appears worn or excessively loose, it may need to be adjusted or replaced.
- While the engine is running, observe the belt's movement. If it's slipping, squealing, or wobbling excessively, it could indicate a problem with the belt tensioner or pulley alignment.
Replacing a worn or damaged alternator belt can often resolve charging issues and prevent further damage to the alternator and other components.
Step 4: Examining the voltage regulator
The voltage regulator is a critical component that ensures the alternator's output voltage remains within the appropriate range for charging the battery and powering electrical systems. A faulty voltage regulator can cause overcharging or undercharging issues.
- Locate the voltage regulator, which is typically mounted on the alternator or near it.
- Inspect the voltage regulator for any signs of physical damage, such as cracks, burns, or loose connections.
- If the voltage regulator is external and easily accessible, you can test it with a multimeter by following the manufacturer's instructions.
- If the voltage regulator appears to be faulty or you're unable to test it, it may need to be replaced.
Replacing a defective voltage regulator can often resolve charging issues and restore proper alternator operation.
Step 5: Checking for loose or damaged connections
Loose or corroded electrical connections can prevent the alternator from charging the battery effectively or cause intermittent charging issues. It's essential to inspect all connections related to the alternator and battery.
- Locate the alternator's wiring harness and battery cables.
- Check for any loose, corroded, or damaged connections at the alternator, battery terminals, and any junction points.
- Clean any corroded connections using a wire brush or baking soda solution, and ensure all connections are tight and secure.
- Inspect the wiring harness for any signs of damage, such as cuts, burns, or exposed wires.
- If any wiring or connections appear damaged, they may need to be repaired or replaced.
Ensuring proper electrical connections can often resolve charging issues and prevent further damage to the alternator and other components.
Step 6: Assessing the condition of the alternator itself
If you've gone through the previous steps and haven't identified the root cause of the alternator issue, it may be time to inspect the alternator itself for signs of wear or damage.
- Locate the alternator, which is typically mounted on the engine or near the serpentine belt.
- Inspect the alternator for any visible signs of damage, such as cracks, leaks, or excessive wear on the bearings or pulley.
- Listen for any unusual noises, such as grinding, whining, or rattling, which could indicate internal damage or bearing failure.
- Check for any signs of overheating, such as discoloration or melted components.
- If the alternator appears to be in poor condition or you suspect internal damage, it may need to be replaced.
Replacing a worn or damaged alternator can restore proper charging and prevent further electrical system issues.
Step 7: Troubleshooting specific alternator problems
While the steps outlined above cover the general troubleshooting process, there may be specific issues that require additional attention. Here are some common alternator problems and their potential solutions:
- Overcharging: If the alternator is overcharging the battery, it can lead to premature battery failure, damage to electrical components, and potential safety hazards. This could be caused by a faulty voltage regulator or internal alternator issues. Replacing the voltage regulator or alternator may be necessary.
- Undercharging: If the alternator is not providing enough charge to the battery, it can result in a drained battery and electrical system issues. This could be due to a worn alternator belt, defective diodes, or internal alternator problems. Checking and replacing the necessary components can resolve the issue.
- Noise or vibration: Excessive noise or vibration from the alternator could indicate bearing failure, pulley misalignment, or other mechanical issues. Inspecting and replacing the bearings, pulley, or the entire alternator may be required.
- Electrical interference: In some cases, the alternator can cause electrical interference or static in the radio or other electronic systems. This could be due to a grounding issue or faulty diodes. Checking and resolving any grounding problems or replacing the diode rectifier may resolve the interference.
By addressing these specific issues, you can ensure that your alternator is functioning correctly and providing the necessary power to your vehicle's electrical systems.
Tips for preventing alternator issues
While alternator problems are sometimes unavoidable, there are several preventive measures you can take to minimize the risk of failure and extend the lifespan of your alternator:
- Regular maintenance: Follow the recommended maintenance schedule for your vehicle, which may include inspecting and replacing the alternator belt, checking electrical connections, and testing the alternator's output.
- Avoid excessive electrical loads: Minimize the use of high-power electrical accessories when the engine is idling or running at low RPMs, as this can place additional strain on the alternator.
- Battery care: Ensure your battery is in good condition and properly charged, as a weak or faulty battery can overwork the alternator and lead to premature failure.
- Driving habits: Avoid excessive idling or short trips, as these conditions can prevent the alternator from fully charging the battery and may contribute to premature wear.
- Environmental factors: Be mindful of extreme temperatures, as excessive heat or cold can affect the performance and lifespan of the alternator and other electrical components.
By following these tips and addressing any issues promptly, you can help prevent costly alternator failures and ensure the reliable operation of your vehicle's electrical system.
When to seek professional help
While many alternator issues can be diagnosed and addressed by following the steps outlined in this guide, there may be times when seeking professional help is necessary. Here are some situations where it's advisable to consult a qualified mechanic or automotive technician:
- Complexity of the repair: If the alternator issue involves complex repairs or replacements that require specialized tools or expertise, it's best to leave it to the professionals.
- Safety concerns: If you feel uncomfortable or unsafe performing any part of the troubleshooting or repair process, it's always better to prioritize your safety and seek professional assistance.
- Persistent issues: If you've followed the troubleshooting steps and the alternator issue persists, it may be indicative of a more complex underlying problem that requires further diagnosis and repair by a professional.
- Lack of experience or expertise: If you're unfamiliar with automotive electrical systems or lack the necessary experience, it's advisable to seek the help of a qualified mechanic to avoid potential damage or safety risks.
- Warranty considerations: If your vehicle is still under warranty, it's recommended to have any alternator repairs or replacements performed by an authorized service center to maintain warranty coverage.
Remember, seeking professional help when needed can save you time, money, and potential frustration in the long run, while also ensuring the proper diagnosis and repair of your vehicle's alternator and electrical system.
Conclusion
Troubleshooting alternator issues can be a daunting task, but by following the step-by-step guide outlined in this article, you can effectively diagnose and address many common alternator problems. From checking the battery and testing the alternator's output to inspecting components like the belt, voltage regulator, and electrical connections, this comprehensive guide provides a structured approach to identifying and resolving alternator-related issues.
Remember, preventive maintenance and addressing issues promptly are key to ensuring the reliable operation of your vehicle's electrical system and avoiding costly repairs or breakdowns. By understanding the signs of alternator problems and following the troubleshooting steps, you can take control of your vehicle's maintenance and potentially save money on repair costs.
If you encounter any difficulties or feel uncomfortable with any part of the process, don't hesitate to seek professional assistance from a qualified mechanic or automotive technician. Their expertise and specialized tools can help ensure a proper diagnosis and repair, while also addressing any potential safety concerns.
If you're experiencing alternator issues or have concerns about your vehicle's electrical system, don't hesitate to reach out to our team of experienced mechanics. We offer comprehensive diagnostic and repair services, as well as preventive maintenance to keep your vehicle running smoothly. Contact us today to schedule an appointment or request a quote.
By staying proactive and addressing alternator issues promptly, you can ensure the reliable operation of your vehicle and enjoy peace of mind on the road.