

Maintaining the right coolant type in a vehicle is crucial for preventing overheating, corrosion, and other types of engine damage. With so many different forms of coolant available on the market, choosing the best fit for your vehicle, be it a classic sedan or a robust Toyota Land Cruiser, can be daunting. The importance of this maintenance aspect cannot be overstated, as the coolant's ability to regulate engine temperature is vital for the vehicle's longevity and performance.
This article will guide readers through the steps of checking their vehicle's coolant levels, selecting the most suitable coolant type, and the process of replacing the old with the new. Proper maintenance not only extends the lifespan of the vehicle but also ensures it runs smoothly, even under extreme conditions. From discerning the most compatible coolant type for your Toyota Land Cruiser to understanding when and how to replace coolant, this comprehensive guide provides all the necessary information to keep your engine cool and efficient.
Choosing the Right Coolant Type
There are several different types of coolants available, each designed for specific vehicle types and engine requirements. Understanding the various coolant types and their compositions is crucial for maintaining optimal engine performance and preventing potential damage.
Understanding Coolant Types
- Inorganic Additive Technology (IAT): IAT coolants, typically green in color, are made with ethylene glycol and contain silicates and phosphates as corrosion inhibitors. These coolants are commonly used in older vehicles, particularly those manufactured in the United States before the late 1990s.
- Organic Acid Technology (OAT): OAT coolants are formulated with a propylene glycol base and organic acid additives. They are often orange in color but can also come in other shades like dark green. OAT coolants are typically compatible with GM, Saab, and VW vehicles.
- Hybrid Organic Acid Technology (HOAT): HOAT coolants combine the benefits of IAT and OAT technologies, offering superior corrosion resistance for both aluminum and iron components. They are available in various colors, including yellow, orange, green, pink, and blue.
- Phosphate-Free HOAT: These coolants are usually turquoise in color and contain a NAP-free (nitrite, nitrate, and phosphate-free) formula made with ethylene glycol, organic, and inorganic corrosion inhibitors. They are low in silicates and do not contain phosphates.
- Phosphated HOAT: Phosphated HOAT coolants use phosphates and organic acids as corrosion inhibitors. They are typically pink or blue in color.
- Silicated HOAT: Recognizable by their vibrant purple color, silicated HOAT coolants utilize silicates and organic acids to inhibit corrosion. They are free of nitrites, nitrates, phosphates, borates, amines, and imidazole.
Additives and Concentration Levels
Some coolants require mixing with water, while others can be poured directly into the cooling system. It is essential to read the bottle's instructions and follow the recommended concentration levels to ensure optimal performance and protection.
Manufacturer Recommendations
The most reliable way to determine the appropriate coolant type for your vehicle is to consult the owner's manual or seek guidance from the manufacturer. They will provide recommendations based on the vehicle's make, model, year, and specific engine requirements. Using the wrong coolant can lead to poor performance or even engine failure.
How to Check Coolant Levels
Safety Precautions
Before checking the coolant level, ensure the engine is completely cool. Never attempt to open the radiator cap or coolant reservoir when the engine is hot, as hot coolant can burst out and cause severe burns. Allow the engine to cool for at least an hour after turning it off.
Locating the Radiator Cap
Locate the radiator cap, typically a black or yellow cap on top of the radiator. Some vehicles have a coolant reservoir tank instead, often a translucent plastic tank near the radiator. If your vehicle has a coolant reservoir, you can check and add coolant there instead of the radiator.
Inspecting the Coolant Level
- With a cold engine, remove the radiator cap or coolant reservoir cap. Press down on the cap while turning it counterclockwise to release any residual pressure safely.
- If checking the radiator, look inside and ensure the coolant level is at or near the top. If it's low, you'll need to add more coolant.
- If checking the coolant reservoir, look for markings on the side indicating the "full" level. The coolant should be at or near this line.
- If the coolant level is low, top it up with the recommended coolant type until it reaches the "full" line. Refer to your owner's manual for the correct coolant type and mixture ratio (if applicable).
Remember, checking and maintaining the proper coolant level is crucial for preventing engine overheating and potential damage. Always exercise caution when working with hot engine components and coolant.
How to Replace Coolant
Drain the Old Coolant
Before replacing the coolant, ensure the engine is completely cool. Never attempt to open the radiator cap or coolant reservoir when the engine is hot, as hot coolant can burst out and cause severe burns. Allow the engine to cool for at least an hour after turning it off.
- Locate the radiator drain petcock, typically found at the bottom corner of the radiator. The petcock is a small valve or plug that allows the coolant to drain out.
- Place a large drain pan underneath the radiator to catch the old coolant.
- Open the radiator cap or coolant reservoir cap to allow air to enter the system, facilitating the draining process.
- Open the drain petcock by either unscrewing, twisting a quarter turn, or pulling it out, depending on the type.
- Once the radiator has drained completely, locate and remove the engine block drain plugs, allowing the remaining coolant to drain out.
- Dispose of the old coolant properly, as it can be harmful to the environment and animals if not handled correctly.
Flush the System
After draining the old coolant, it is recommended to flush the cooling system to remove any remaining contaminants or debris.
- Reconnect the radiator hose and reinstall the drain petcock and block drain plugs.
- Fill the cooling system with clean water, either through the radiator or the coolant reservoir, depending on your vehicle.
- Start the engine and let it run for a few minutes to circulate the water throughout the system.
- Turn off the engine and allow it to cool completely before draining the flushing water.
- Repeat the flushing process if necessary until the drained water appears clean and free of contaminants.
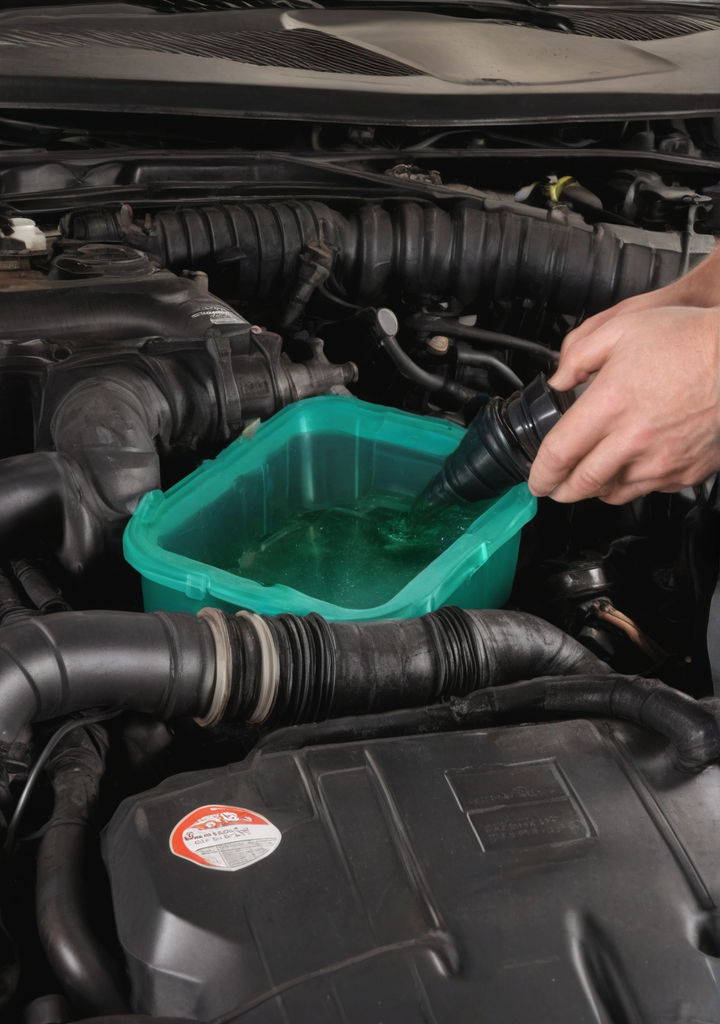
Add the New Coolant
- Determine the appropriate coolant type and quantity required for your vehicle by consulting the owner's manual or seeking guidance from the manufacturer.
- Mix the new coolant with distilled water according to the manufacturer's recommended ratio, typically a 50/50 mix.
- Slowly pour the coolant mixture into the radiator or coolant reservoir until it reaches the appropriate level.
- Start the engine and let it run for a few minutes, allowing the coolant to circulate throughout the system.
- Monitor the coolant level and top it up if necessary, ensuring it reaches the "full" or "hot" mark on the radiator or coolant reservoir.
- Replace the radiator cap or coolant reservoir cap securely.
- Dispose of any spilled or unused coolant properly, as it can be harmful to the environment.
Remember to check for any coolant leaks after completing the replacement process. If leaks are present, address them promptly to maintain the integrity of the cooling system.
Conclusion
Through this article, we've explored the importance of choosing the right coolant for your vehicle, be it a classic car or a robust Toyota Land Cruiser, to prevent overheating, corrosion, and ensure optimal engine performance. We've guided you through the essentials of checking and maintaining coolant levels, and selecting the most appropriate coolant type for your vehicle, alongside a step-by-step guide on how to replace the old coolant. Emphasizing the significance of these practices underlines our commitment to helping you keep your vehicle running smoothly and efficiently, by equipping you with the knowledge needed to perform these critical maintenance tasks.
As we conclude, let's remember the broader implications of regular vehicle maintenance. Properly managing your vehicle’s coolant not only extends the lifespan of the engine but also contributes to the overall safety and reliability of your vehicle. While the steps and tips provided lay the groundwork, consulting your vehicle's owner's manual or seeking advice from a professional when unsure remains paramount. Keeping up with these maintenance tasks ensures that your car remains a reliable companion on the road, safeguarding its performance against the rigors of everyday use and extreme conditions alike.
FAQs
Q: How can I determine the correct coolant type for my vehicle?A: To identify the appropriate coolant for your vehicle, consult your car's owner manual. Coolants come in various colors such as green, red, blue, yellow, or orange, with green being the most common and typically based on Ethylene Glycol.
Q: What is the best way to select the right coolant for my car?A: The most reliable method to ensure you are choosing the correct coolant is to visit your car's dealership. They provide coolant specifically formulated for your make and model, often branded specifically for your vehicle.
Q: What are the steps to check and replace my car's coolant?A: Follow these steps to replace your car's coolant:
- Make sure the engine is off and has cooled down completely.
- Remove the radiator cap from the engine.
- Drain out the old coolant.
- Clean the cooling system.
- Refill with new coolant.
- Bleed the cooling system to remove any air pockets.
Q: Is it important to use a specific type of antifreeze coolant in my vehicle?A: Yes, it is crucial to use the correct type of coolant as different vehicles require different formulations. These formulations are designed to cater to specific engine types, including diesel, and vehicles from American, Asian, and European manufacturers, to ensure optimal performance in extreme temperatures.