

Replacing the brake rotors on your 2019 Honda Passport is a critical maintenance task to ensure your vehicle's braking performance is optimal. Worn or damaged brake rotors can reduce stopping power, increase braking distances, and lead to other issues like vibrations and noise when braking. This guide will walk you through the brake rotor replacement process, including costs, tools required, and torque specifications.
Tools and Supplies Needed:
- Socket set (including 12mm and 19mm sockets)
- Torque wrench
- Breaker bar
- C-clamp (for compressing the brake caliper)
- Lug wrench or impact wrench
- Jack and jack stands
- Flathead screwdriver or brake tool
- New brake rotors (recommended to replace in pairs)
- Brake cleaner
- New brake pads (optional but recommended)
Estimated Costs:
- DIY Brake Rotor Replacement: $200–$400 (parts and tools)
- Professional Brake Rotor Replacement: $300–$600 (including labor)
Time Required:
- DIY Time: 2–3 hours, depending on experience level.
Step-by-Step Guide for Brake Rotor Replacement:
- PreparationStart by parking your 2019 Honda Passport on a level surface. Set the parking brake and loosen the lug nuts on the wheels using a lug wrench, but don't remove them yet. If you're replacing the front rotors, make sure to turn the wheels slightly for better access to the brake calipers.
- Lift the VehicleUse a jack to lift the front or rear of the vehicle (depending on which rotors you're replacing), and secure it with jack stands. Never work on a vehicle supported only by a jack.
- Remove the WheelOnce the vehicle is securely lifted, remove the lug nuts and take off the wheel to access the brake components.
- Remove the Brake CaliperLocate the brake caliper, which is secured by 12mm or 14mm bolts (depending on the model). Use a socket wrench to remove the caliper bolts and carefully lift the caliper off the rotor. Do not let the caliper hang by the brake line—use a zip tie or wire to suspend it from the suspension.
- Remove the Brake PadsWith the caliper out of the way, remove the brake pads from the caliper bracket. If the pads are still in good condition, you can reuse them, but it's generally a good idea to replace them along with the rotors.
- Remove the Caliper BracketThe caliper bracket is held in place by larger 19mm bolts. Use a breaker bar if necessary to remove these bolts, as they may be tight. Once removed, set the bracket aside.
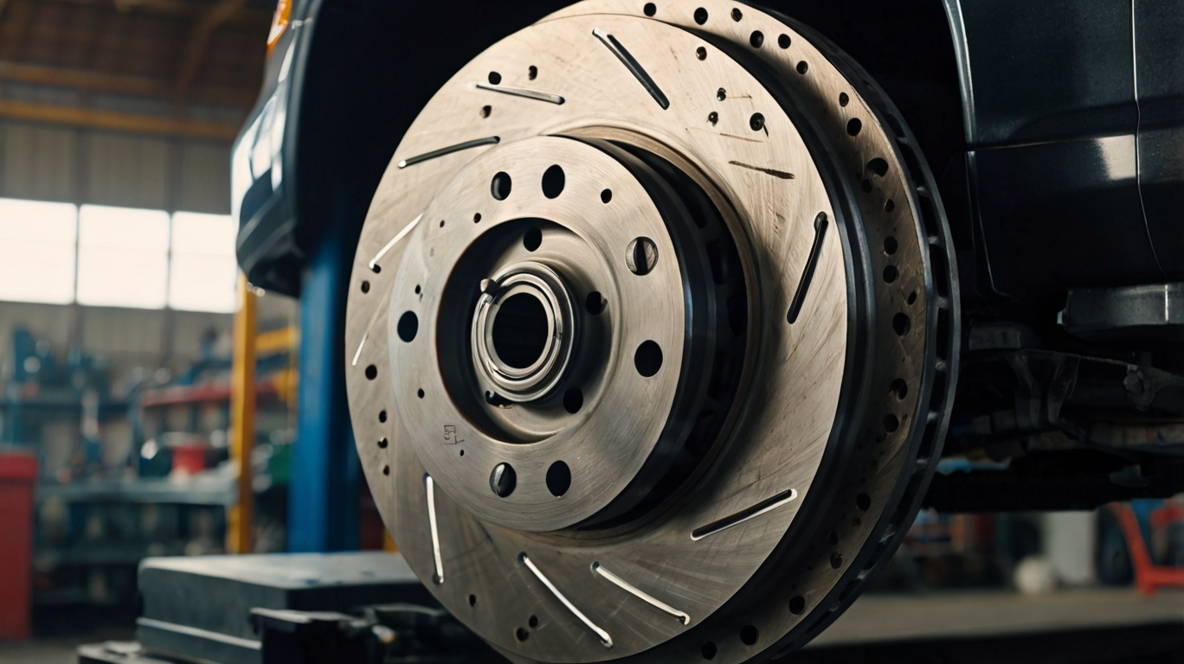
- Remove the Old RotorThe brake rotor may be held in place with a small retaining screw, which can be removed using a Phillips head screwdriver. If the rotor is stuck to the hub due to rust, tap it gently with a rubber mallet to break it loose.
- Install the New RotorPlace the new rotor onto the hub, ensuring it is seated properly. If your 2019 Honda Passport uses rotor screws, reinstall them at this point.
- Reinstall the Caliper BracketBolt the caliper bracket back into place using the 19mm bolts. Torque the bolts to the manufacturer’s specifications, which for most Honda vehicles is around 85-90 ft-lbs.
- Install the New Brake Pads (Optional)If you're replacing the brake pads, insert the new pads into the caliper bracket. Make sure the pads are properly aligned and seated.
- Compress the Caliper PistonBefore reinstalling the brake caliper, you'll need to compress the caliper piston. Use a C-clamp to slowly push the piston back into the caliper, ensuring it's fully retracted.
- Reinstall the Brake CaliperOnce the piston is compressed, place the caliper back over the new rotor and brake pads. Secure it with the 12mm or 14mm bolts and torque them to approximately 25-30 ft-lbs.
- Reinstall the WheelAfter the brake caliper is securely fastened, reinstall the wheel and hand-tighten the lug nuts. Lower the vehicle back to the ground and use a torque wrench to tighten the lug nuts to 90-100 ft-lbs.
- Test the BrakesBefore driving, press the brake pedal several times to ensure the caliper piston is properly seated against the new pads and rotor. Test drive the vehicle at low speeds to check for any abnormal noises or vibrations.
When to Replace Brake Rotors:
- Signs of Worn Rotors:Pulsing or vibrations when brakingGrooves or deep scoring on the rotor surfaceIncreased stopping distanceSqueaking or grinding noises when braking
- Pulsing or vibrations when braking
- Grooves or deep scoring on the rotor surface
- Increased stopping distance
- Squeaking or grinding noises when braking
Torque Specifications:
- Caliper Bracket Bolts: 85-90 ft-lbs
- Caliper Bolts: 25-30 ft-lbs
- Lug Nuts: 90-100 ft-lbs
FAQs:
1. How often should I replace the brake rotors on my Honda Passport?Brake rotors typically last between 50,000 and 70,000 miles, but they may wear out sooner depending on driving conditions and habits.
2. Can I just replace the brake pads without replacing the rotors?You can replace the brake pads without changing the rotors, but if the rotors are worn or damaged, it’s recommended to replace them to ensure proper braking performance.
3. What are the benefits of replacing the brake rotors along with the pads?New rotors provide a smooth surface for the brake pads, improving stopping power and reducing the risk of uneven wear or vibration.
4. Can I drive with worn brake rotors?Driving with worn rotors can reduce braking effectiveness and increase stopping distances, which may compromise your safety. It’s best to replace worn rotors as soon as possible.